 Pin It
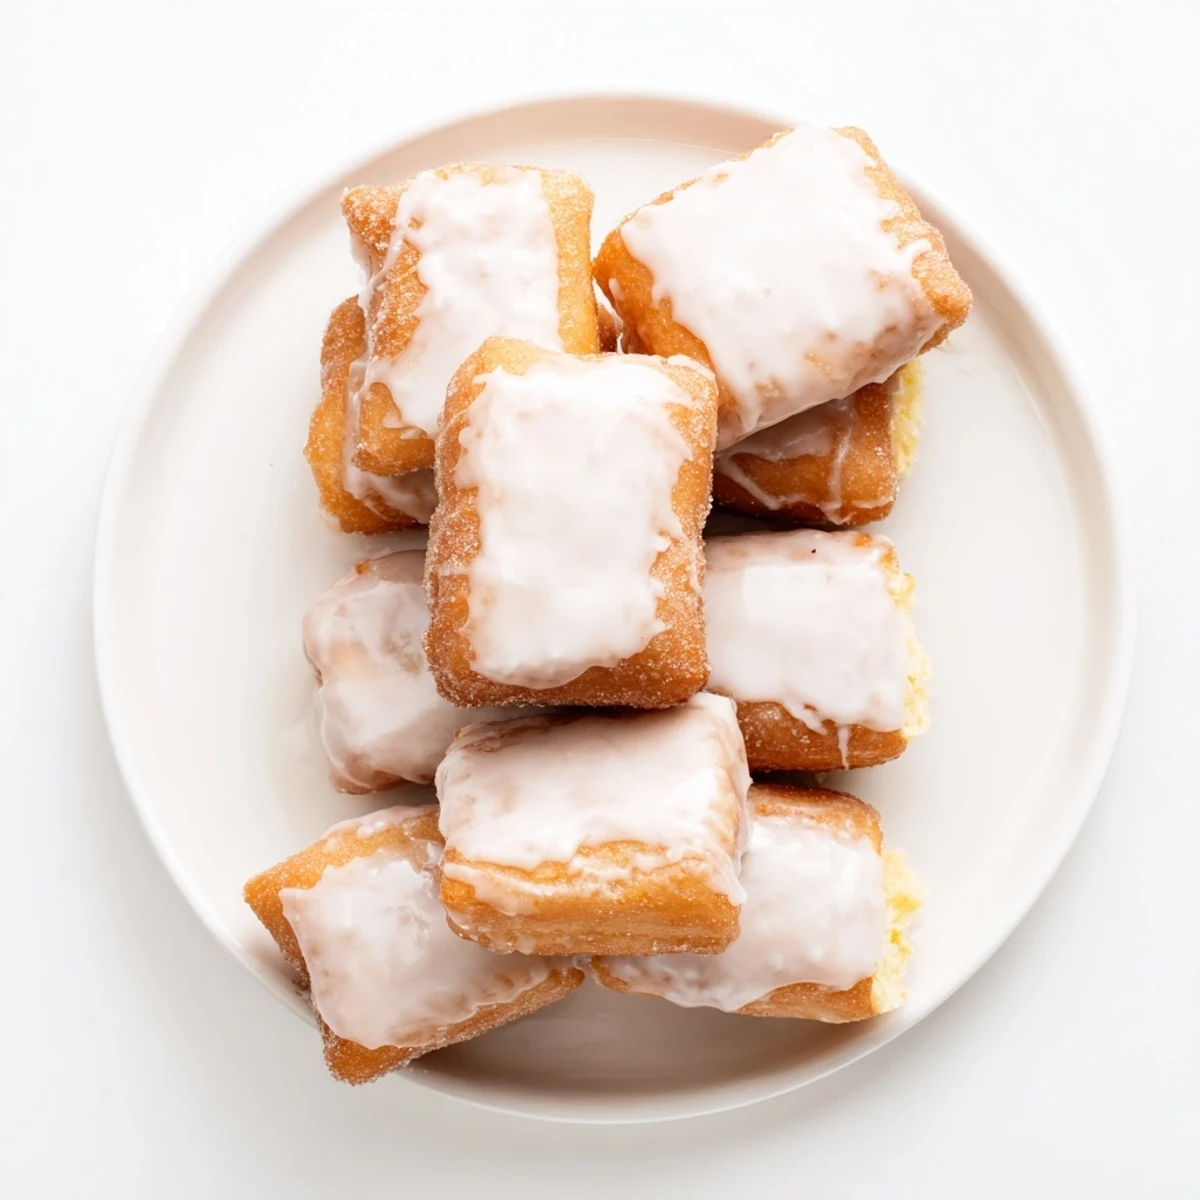
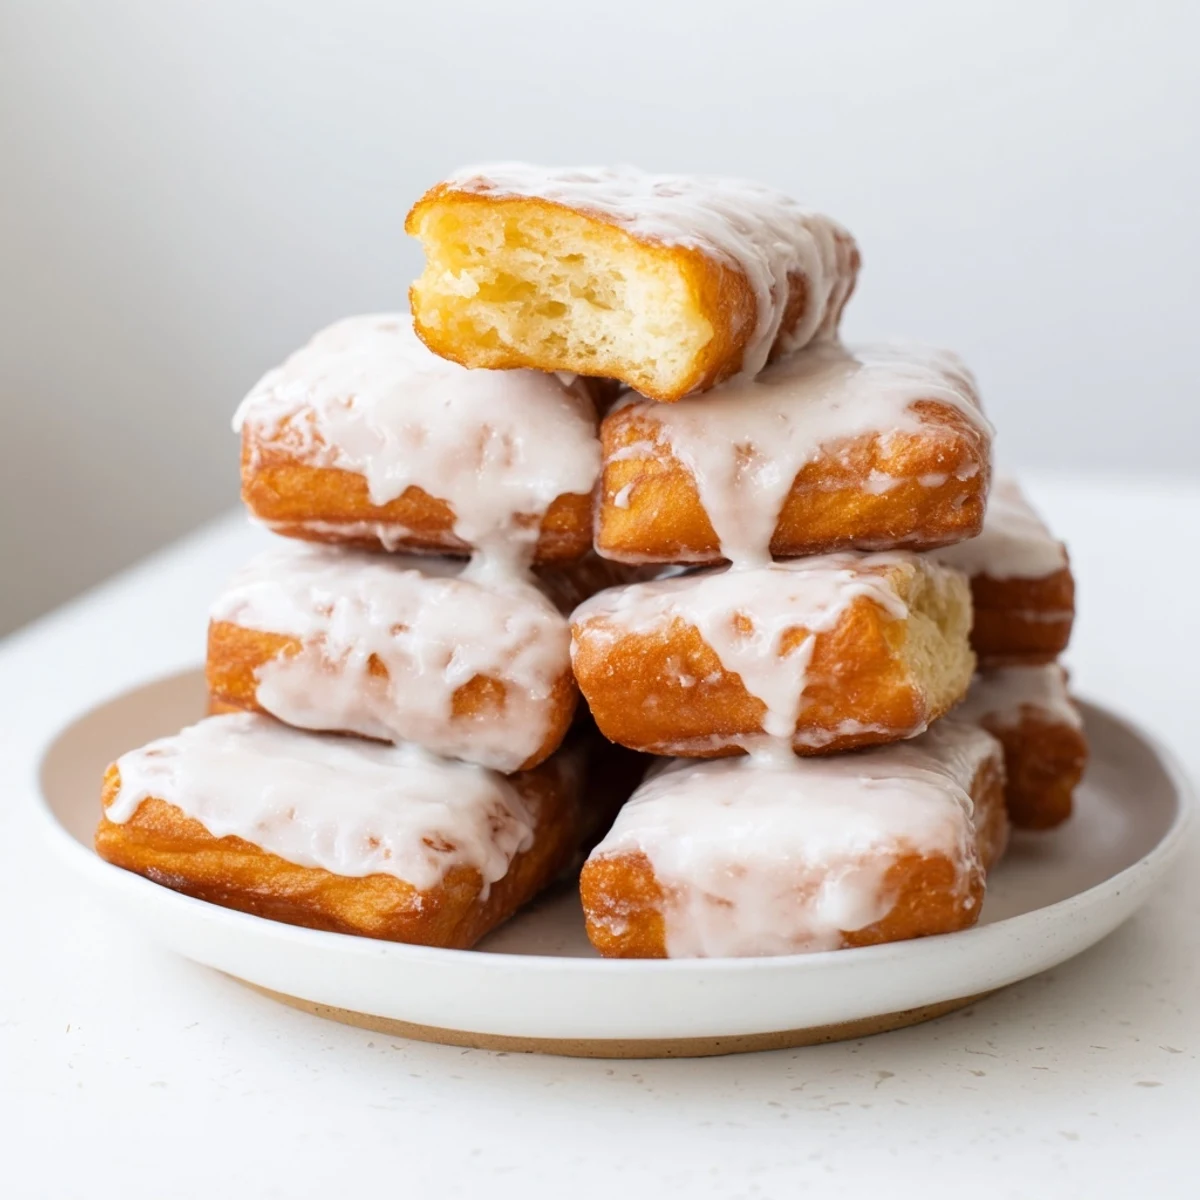
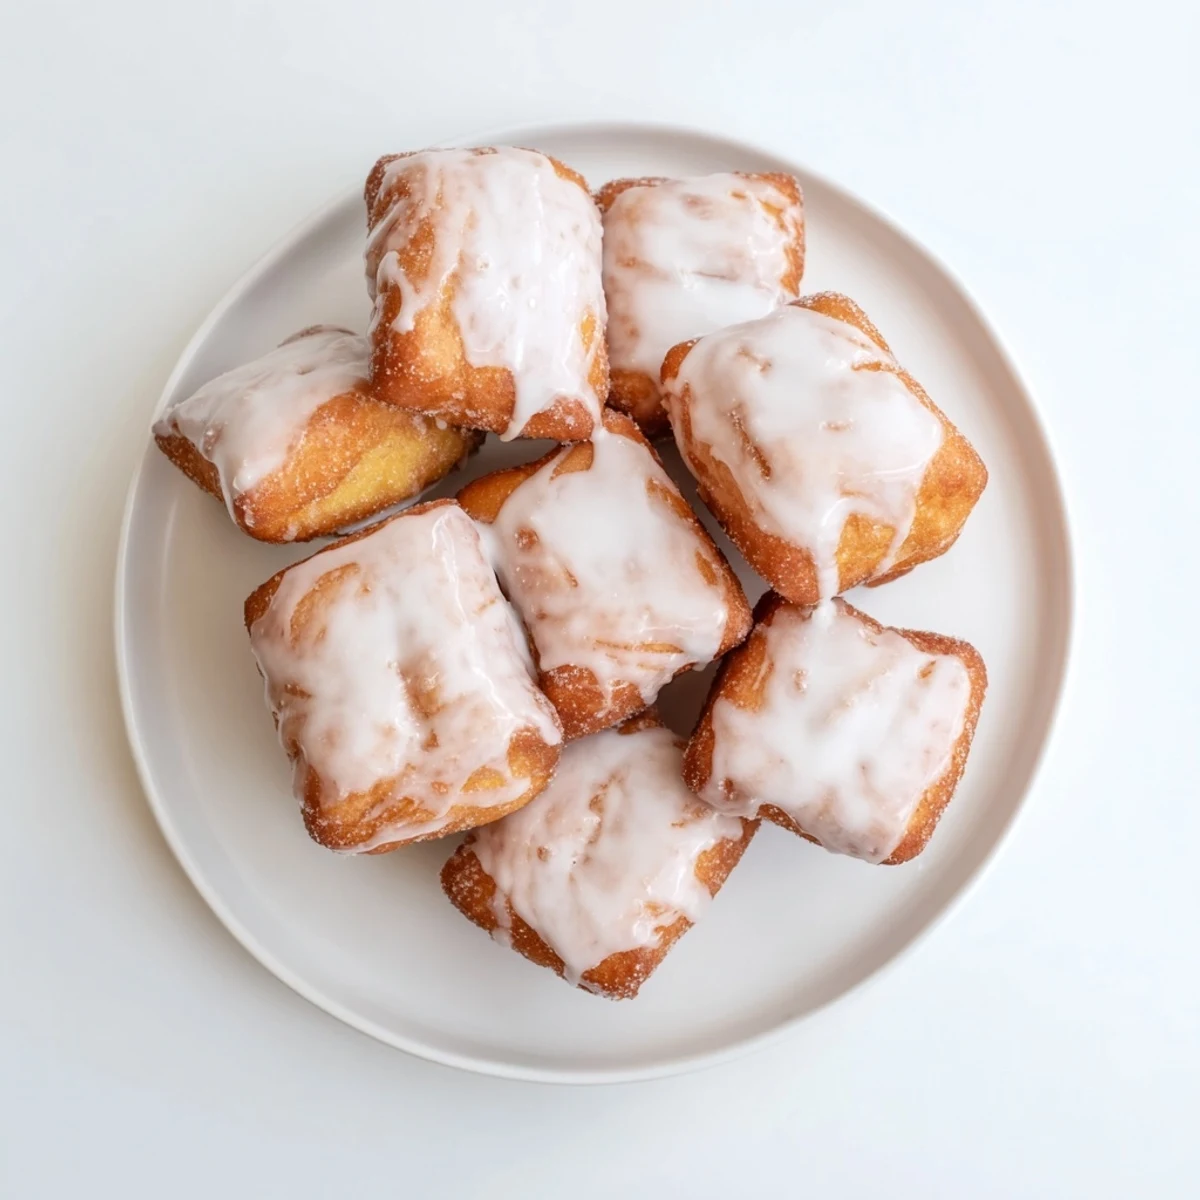
 These New Orleans-style beignet squares feature a remarkably light and tender texture thanks to the tangy buttermilk in the dough. After frying until golden brown, each square gets dipped in a luscious vanilla glaze that adds just the right amount of sweetness. The dough requires a rising period, so plan ahead for the best results. Serve them warm while the glaze is still slightly gooey for the ultimate breakfast or dessert experience.
My grandmother's kitchen always smelled like frying dough on Sunday mornings, something I didn't fully appreciate until I tried recreating those New Orleans beignets in my tiny apartment years later. The first batch turned into hockey pucks, but the second time around, everything clicked. Now these buttermilk squares are my go-to for weekend comfort, especially when rain's been tapping against the windows all morning.
Last winter, I made three batches for my sister's birthday brunch because nobody believed one would be enough. We ended up eating them standing up around the counter, coffee in one hand and glaze-dusted squares in the other. She said they were better than the ones we had in New Orleans, which might just be sisterly bias, but I'll take it.
Ingredients
- All-purpose flour: The backbone of your dough, providing structure while keeping things tender
- Active dry yeast: What makes these puff up beautifully in hot oil, creating those signature air pockets
- Granulated sugar: Feeds the yeast and adds just enough sweetness to balance the tangy buttermilk
- Kosher salt: Enhances all flavors and keeps the dough from tasting flat
- Buttermilk and whole milk: The buttermilk adds tang and tenderness, while whole milk contributes richness
- Large eggs: Provide structure and help the dough hold its shape during frying
- Unsalted butter: Adds flavor and keeps the crumb soft and tender
- Vegetable oil: Neutral oil that can handle high heat without burning
- Powdered sugar: Creates that signature smooth glaze that coats every square perfectly
- Whole milk and vanilla extract: Thins the glaze just right and adds that warm, familiar flavor
Instructions
- Combine your dry ingredients:
- Whisk the flour, yeast, sugar, and salt together in a large bowl until everything's evenly distributed
- Mix the wet ingredients:
- In another bowl, whisk the buttermilk, milk, eggs, and melted butter until smooth
- Make the dough:
- Create a well in the dry ingredients and pour in the wet mixture, stirring until a shaggy, sticky dough forms
- Knead it smooth:
- Turn the dough onto a floured surface and knead for 6 to 8 minutes until it's smooth and elastic, or use your stand mixer with a dough hook for about 5 minutes
- Let it rise:
- Place the dough in a lightly oiled bowl, cover it, and let it rise in a warm spot for 60 to 75 minutes until doubled in size
- Roll and cut:
- Punch down the risen dough, then roll it out to about ½ inch thickness and cut into 2 inch squares
- Second rise:
- Place the squares on a parchment lined tray, cover loosely, and let them rest for 20 minutes before frying
- Fry until golden:
- Heat your oil to 350°F and fry the beignets in batches, 1 to 2 minutes per side, until puffed and beautifully browned
- Make the glaze:
- Whisk the powdered sugar, milk, and vanilla until you have a smooth, pourable consistency
- Glaze and serve:
- Dip each warm beignet into the glaze, let the excess drip off, and place on a rack to set
 Pin It
 These have become the thing my friends request most often, probably because they show up right when we need them most. There's something about standing around a hot fryer, watching dough puff up in golden clouds, that makes everything else fade away for a while.
Getting That Perfect Rise
Temperature matters more than you might think with yeasted doughs. If your kitchen runs cold, find the warmest corner near your oven or preheating toaster. I've even been known to proof dough on top of the refrigerator, which sounds strange until you realize it's actually the perfect spot.
Frying Without Fear
The trick to confident frying is knowing your oil is ready but not smoking. I drop in a tiny scrap of dough first, if it sizzles immediately and rises to the surface, we're good to go. An instant thermometer takes the guesswork out and prevents that sad scenario where the outside burns before the inside cooks through.
Make Ahead and Storage
You can cut and freeze the risen squares on a parchment lined tray, then fry straight from frozen, just adding an extra minute to the cooking time. Leftovers, if they somehow exist, can be reheated in a 300°F oven for about 5 minutes to recrisp.
- Don't refrigerate the raw dough or the yeast will go dormant
- Fried beignets are best eaten within a few hours while still slightly warm
- Store any leftovers in a paper bag to maintain some crispness
 Pin It
 There's nothing quite like the first bite of a freshly glazed beignet, still warm from the fryer, with coffee nearby and good people around. Some recipes are just worth the mess.
Recipe FAQs
- → What makes these beignets different from traditional ones?
-
The addition of buttermilk creates a more tender crumb and subtle tanginess that balances the sweet glaze perfectly.
- → Can I prepare the dough ahead of time?
-
Yes, you can refrigerate the dough after the first rise overnight. Let it come to room temperature before rolling and frying.
- → What's the best temperature for frying?
-
Maintain oil at 350°F (175°C) for optimal results. Too hot and they'll burn outside while remaining raw inside.
- → How should I store leftover beignets?
-
Store in an airtight container at room temperature for up to 2 days. Reheat briefly in a 300°F oven to restore freshness.
- → Can I freeze the dough or finished beignets?
-
Freeze unglazed beignets in freezer bags for up to 3 months. Thaw and glaze when ready to serve.
