 Pin It
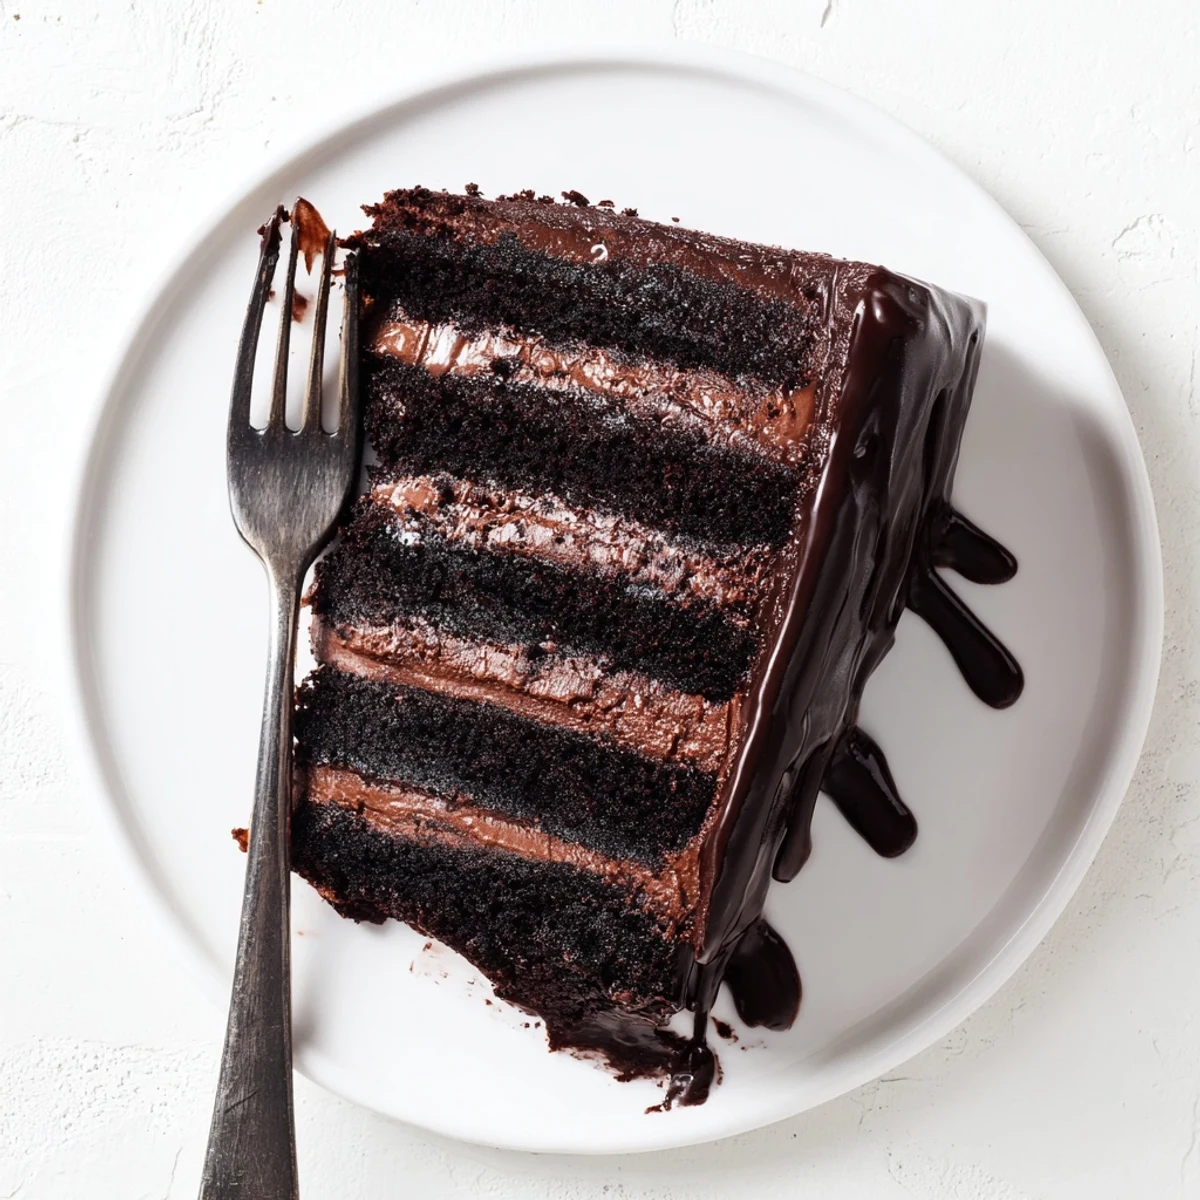
 This elegant dark chocolate dessert combines three luxurious components: a tender chocolate sponge base, a silky dark chocolate mousse filling, and a mirror-like glaze topping. The creation process involves whipping eggs to triple volume for an airy sponge, tempering egg yolks with hot syrup for the mousse base, and carefully folding whipped cream to achieve that signature velvety texture. After assembling and chilling for at least four hours, the final chocolate ganache glaze adds the perfect finishing touch.
Ideal for dinner parties, celebrations, or whenever you crave something truly decadent, this French classic yields ten generous servings. The preparation requires some patience and technique, but the impressive results make every step worthwhile.
The first time I attempted this cake, I accidentally set the mousse layer with the springform ring slightly askew. Instead of a perfectly cylindrical dessert, I ended up with a charmingly lopsided masterpiece that my guests insisted looked more artistic anyway. That kitchen disaster taught me that sometimes the most memorable desserts are the ones that refuse to follow the rules.
My grandmother used to say that chocolate desserts were the language of love, and I never really understood until I spent an entire Sunday afternoon crafting this cake for my partners birthday. The way the kitchen smelled like a European chocolaterie for hours afterward was almost better than the celebration itself.
Ingredients
- 3 large eggs, room temperature: Cold eggs wont whip properly into the sponge, so set them out at least an hour before you begin
- 100 g granulated sugar: This amount sweetens the sponge without competing with the dark chocolate layers
- 80 g all-purpose flour: Bread flour would make the sponge too tough, and cake flour might not provide enough structure
- 20 g unsweetened cocoa powder: Dutch-processed cocoa gives a deeper color and mellower flavor than natural variety
- 1/2 tsp baking powder: The sponge needs this lift because the cocoa weighs down the batter
- 1/4 tsp salt: A pinch enhances chocolate flavor just like it does in caramel sauce
- 30 ml whole milk: Adds moisture to the sponge without making it dense
- 30 ml vegetable oil: Oil keeps the sponge tender longer than butter would
- 1 tsp vanilla extract: Use pure extract rather than imitation for the best flavor
- 250 g high-quality dark chocolate (60–70%): The mousse quality depends entirely on the chocolate you choose, so buy the best you can afford
- 400 ml heavy cream, cold: Ultra-pasteurized cream takes longer to whip, so look for regular heavy cream
- 3 large egg yolks, room temperature: These create the custard base that stabilizes the mousse
- 60 g granulated sugar: Balances the bittersweet chocolate without making the mousse cloying
- 2 tbsp water: Creates the sugar syrup that cooks the yolks for food safety
- 1/2 tsp vanilla extract: Rounds out the chocolate flavor in the mousse
- Pinch of salt: Makes chocolate taste more like itself
- 120 g dark chocolate, chopped: Same percentage as the mousse chocolate creates continuity
- 80 ml heavy cream: Creates the ganache glaze that finishes the cake
- 1 tbsp unsalted butter: Adds shine and helps the glaze set properly
Instructions
- Prep your pan and warm the oven:
- The sponge needs even heat to rise properly, so position your rack in the center and let the oven fully preheat before mixing anything
- Sift the dry ingredients together:
- Combine the flour, cocoa, baking powder, and salt in a bowl, pressing any lumps through the sieve for an even texture
- Whip the eggs and sugar:
- Beat them on high speed until they turn pale yellow and nearly triple in volume, leaving ribbons when you lift the beaters
- Fold gently but thoroughly:
- Add the dry ingredients in three additions, then drizzle in the milk, oil, and vanilla, folding just until no dry streaks remain
- Bake until just set:
- The sponge is done when it springs back lightly in the center and a toothpick comes out clean, usually about 18 minutes
- Melt chocolate for the mousse:
- Set your chopped chocolate over barely simmering water and stir until smooth, then let it cool while you prepare the yolks
- Make a simple syrup:
- Heat the sugar and water until the sugar dissolves completely and the mixture just begins to bubble around the edges
- Temper the egg yolks:
- Whisk the yolks constantly while slowly pouring in the hot syrup, continuing until the mixture cools slightly and thickens
- Combine chocolate and yolks:
- Stir the melted chocolate and vanilla into the yolk mixture, then add the pinch of salt
- Whip the heavy cream:
- Beat until soft peaks form that droop gently when you lift the whisk, avoiding overwhipping which makes folding difficult
- Lighten the chocolate base:
- Stir about one-third of the whipped cream into the chocolate mixture to loosen it before adding the rest
- Fold carefully:
- Add the remaining cream in two portions, folding gently until no white streaks remain but maintaining as much air as possible
- Prepare for assembly:
- Place the cooled sponge on your serving plate, then lock the springform ring back around it
- Add the mousse layer:
- Pour the mousse over the sponge and smooth the top with an offset spatula, then refrigerate for at least four hours
- Make the glaze:
- Heat the cream until tiny bubbles form around the edges, then pour over the chopped chocolate and butter
- Let it rest and stir:
- Wait one minute for the chocolate to soften, then stir until the glaze is glossy and smooth
- Cool the glaze slightly:
- Let it sit for about ten minutes so its thick enough to coat the cake without running off completely
- Glaze the cake:
- Pour the glaze in the center and use an offset spatula to guide it over the edges, letting it drip naturally
- Final chilling:
- Refrigerate for thirty minutes to set the glaze completely before slicing and serving
 Pin It
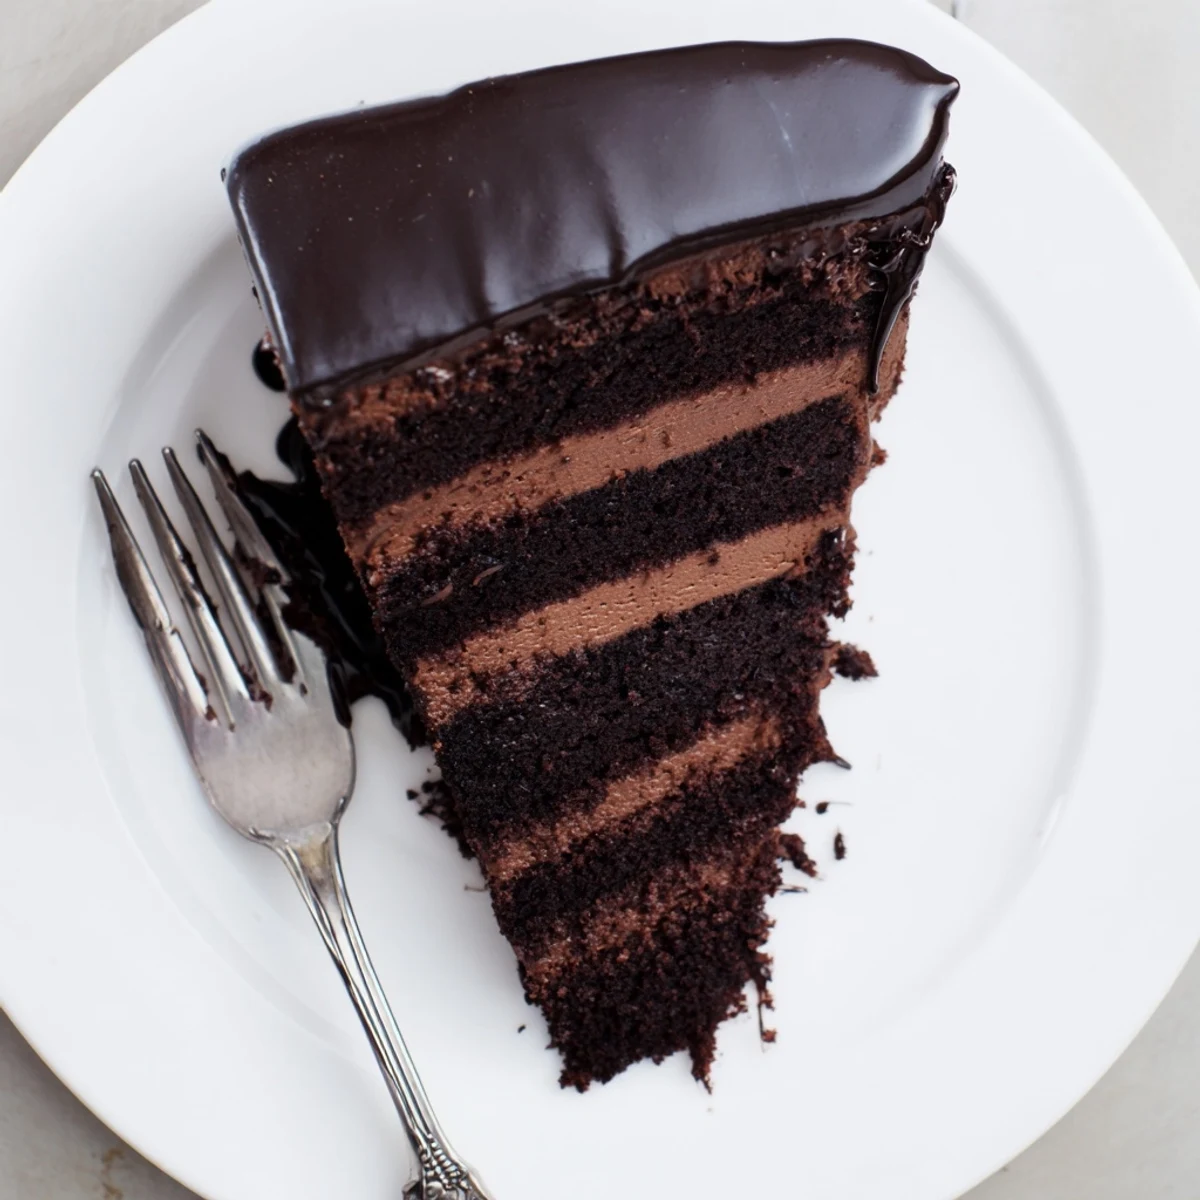
 This cake has become my go-to celebration dessert because it looks like something from a bakery window but comes entirely from my tiny kitchen. The silence that falls over a dinner table when the first forkful is taken is better than any compliment.
Choosing Your Chocolate
Ive learned the hard way that the percentage of cocoa in your chocolate makes or breaks this recipe. Anything below 60 percent creates a mousse thats too sweet to balance the sponge, while anything above 70 can become unpleasantly bitter. The sweet spot around 65 to 70 percent gives you that sophisticated dark chocolate flavor that keeps people coming back for just one more thin slice.
Working With Mousse
The most common mistake people make with mousse is deflating it while folding, which turns something ethereal into something dense. The trick is folding in one-third of the whipped cream first to loosen the chocolate base, then adding the remaining cream in two separate additions. This gentle approach preserves the air bubbles that make mousse feel like eating a chocolate cloud.
Making It Ahead
The beauty of this cake is that it actually improves after chilling overnight, which means you can assemble it completely stress-free the day before serving. The flavors meld together, the mousse sets to the perfect consistency, and you avoid that last-minute panic of trying to glaze a dessert while your guests are already arriving.
- Leave the glaze off until the day youre serving to maintain that glossy finish
- Press plastic wrap directly against the cut edges of any leftovers to prevent the mousse from drying out
- Bring slices to room temperature for about fifteen minutes before serving for the best texture
 Pin It
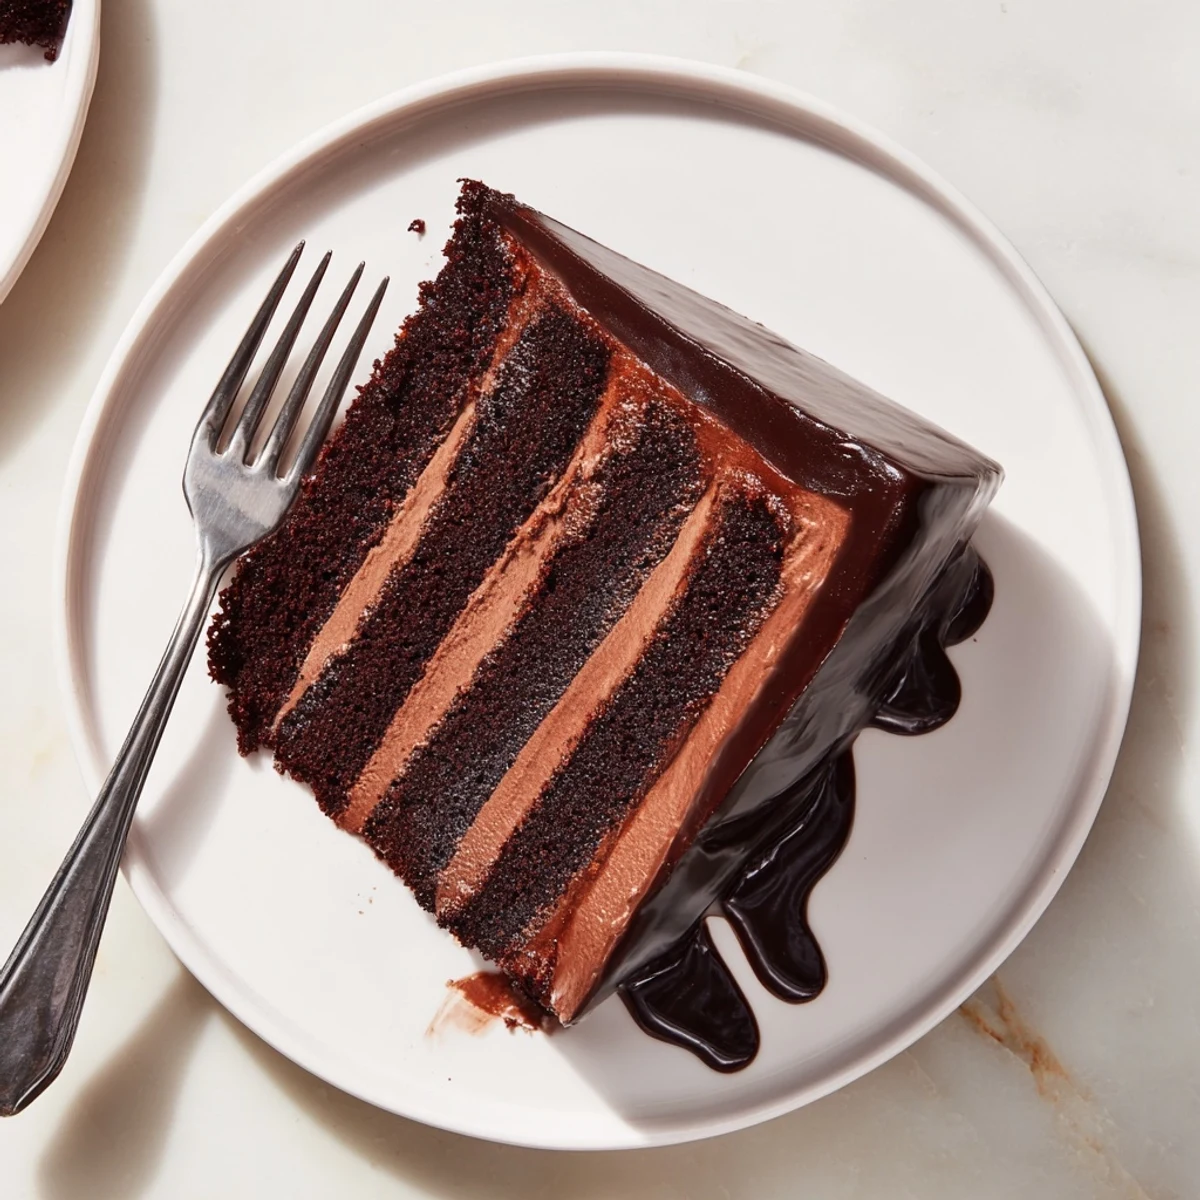
 Theres something deeply satisfying about slicing into this cake and revealing those perfect dark layers against the light sponge. Every bite feels like a special occasion.
Recipe FAQs
- → What makes this mousse cake different from regular chocolate cake?
-
The combination of airy sponge, creamy mousse, and glossy glaze creates three distinct textures in one dessert. The mousse layer is lighter than traditional ganache but richer than standard frosting, offering that signature velvety mouthfeel French desserts are known for.
- → Can I make this dessert ahead of time?
-
Absolutely. This actually tastes better when made 1-2 days ahead, allowing flavors to meld and textures to fully set. Store refrigerated covered loosely, and add the glaze up to 24 hours before serving. The glossy finish remains beautiful when chilled properly.
- → What percentage of dark chocolate works best?
-
For optimal results, use chocolate between 60-70% cocoa. This provides the perfect balance—intense chocolate flavor without excessive bitterness. Higher percentages may require adjusting sugar slightly, while lower percentages result in an overly sweet finish.
- → Why must the chilling time be at least four hours?
-
The extended chilling period allows the mousse to properly set and develop its creamy texture. Rushing this step results in a soft, unstable dessert that won't hold its shape when sliced. The wait ensures clean, professional-looking portions.
- → Can I substitute ingredients for dietary needs?
-
Replace heavy cream with full-fat coconut milk for dairy-free versions. Use gluten-free flour blends for the sponge. For egg concerns, pasteurized eggs eliminate safety worries. Keep in mind substitutions may slightly alter texture and richness.
- → How do I achieve the perfect glossy glaze finish?
-
Temperature control is crucial—cool the glaze for exactly 10 minutes before pouring. Too hot and it runs off the sides; too cool and it won't flow smoothly. Pour slowly in the center, letting gravity create even drips down the edges.
