 Pin It
 Master the art of creating an impressive fishtail braid pie crust that adds professional elegance to your baked creations. This decorative technique uses simple dough strips woven into an intricate fishtail pattern, resulting in a stunning edge that makes any pie look bakery-worthy.
The process begins with a classic buttery dough rolled thin and cut into even strips. By weaving these strips using the fishtail braiding method—alternating outer pieces toward the center—you'll achieve a sophisticated woven effect that catches eyes and elevates presentations. Perfect for holiday gatherings, dinner parties, or whenever you want to impress.
This versatile decoration works beautifully with fruit pies, quiches, savory pot pies, and custard tarts. The braided edge can be applied before baking or added during the final stages of longer-bake pies. An egg wash creates a gorgeous golden finish that makes the intricate texture really pop.
My grandmother could transform anything into art, even pie dough. I watched her hands move with that confident rhythm that only comes from decades of baking, wondering how she made something so ordinary look so extraordinary. When she first showed me the fishtail braid technique, I sat at her kitchen table completely mesmerized, realizing that presentation really does taste better. Now every time I create that woven edge, I'm back in her sunlit kitchen, learning that food should be beautiful before it's even delicious.
Last Thanksgiving, I brought an apple pie with this braided crust to my neighbor's potluck dinner. The room went quiet when I walked in, not because of any grand announcement but because people literally stopped midconversation to stare at that golden woven edge. Someone actually asked if I'd secretly bought it from an expensive bakery, and when I explained it was just regular pie dough with a little extra attention, three women immediately pulled out their phones to take notes. That's the thing about this recipe—it makes you look like a kitchen magician without any actual magic required.
Ingredients
- Allpurpose flour: The backbone of your crust, providing structure and that tender flake we all crave in a good pie dough
- Cold unsalted butter: Keeping this icecold is what creates those magical flaky layers, so dont let it warm up or you'll lose the texture
- Salt: Just enough to wake up all the flavors without making your crust taste salty
- Sugar: Optional but recommended for sweet pies, it adds the subtlest hint of sweetness that rounds everything out beautifully
- Ice water: The exact amount varies depending on humidity, so add gradually and trust your hands to tell you when the dough feels right
- Egg wash: This transforms your braid from pale bakery dough into golden gorgeous art that everyone will Instagram immediately
Instructions
- Prepare your dough with cold confidence:
- Whisk the flour, salt, and sugar together in a large bowl, then work in those cold butter cubes until everything looks like coarse crumbs with some peasized butter pieces still visible. Add ice water gradually, mixing gently just until the dough comes together, then divide into disks and chill for at least an hour.
- Roll and cut your strips with precision:
- On a lightly floured surface, roll one chilled disk into a rectangle about 1/8 inch thick, then use a ruler and knife to cut at least six even strips about 12 inches long and 1/2 inch wide.
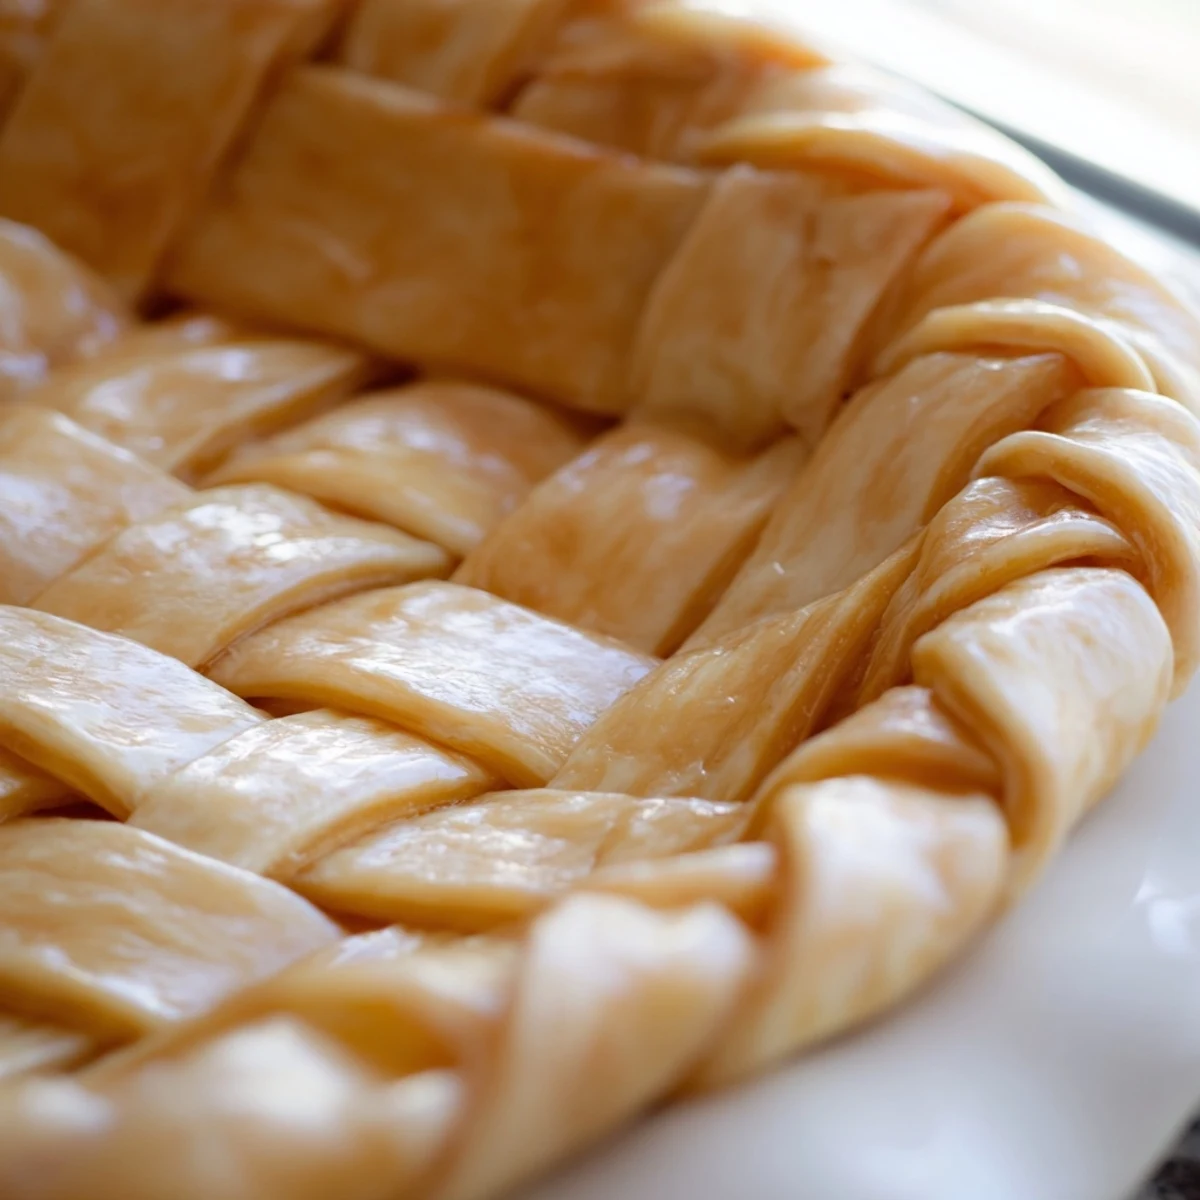
- Create the fishtail braid pattern:
- Lay three strips side by side with ends pressed together, start with one regular braid stitch, then switch to the fishtail technique by crossing the outermost strips to the center repeatedly until complete, pressing ends together to seal.
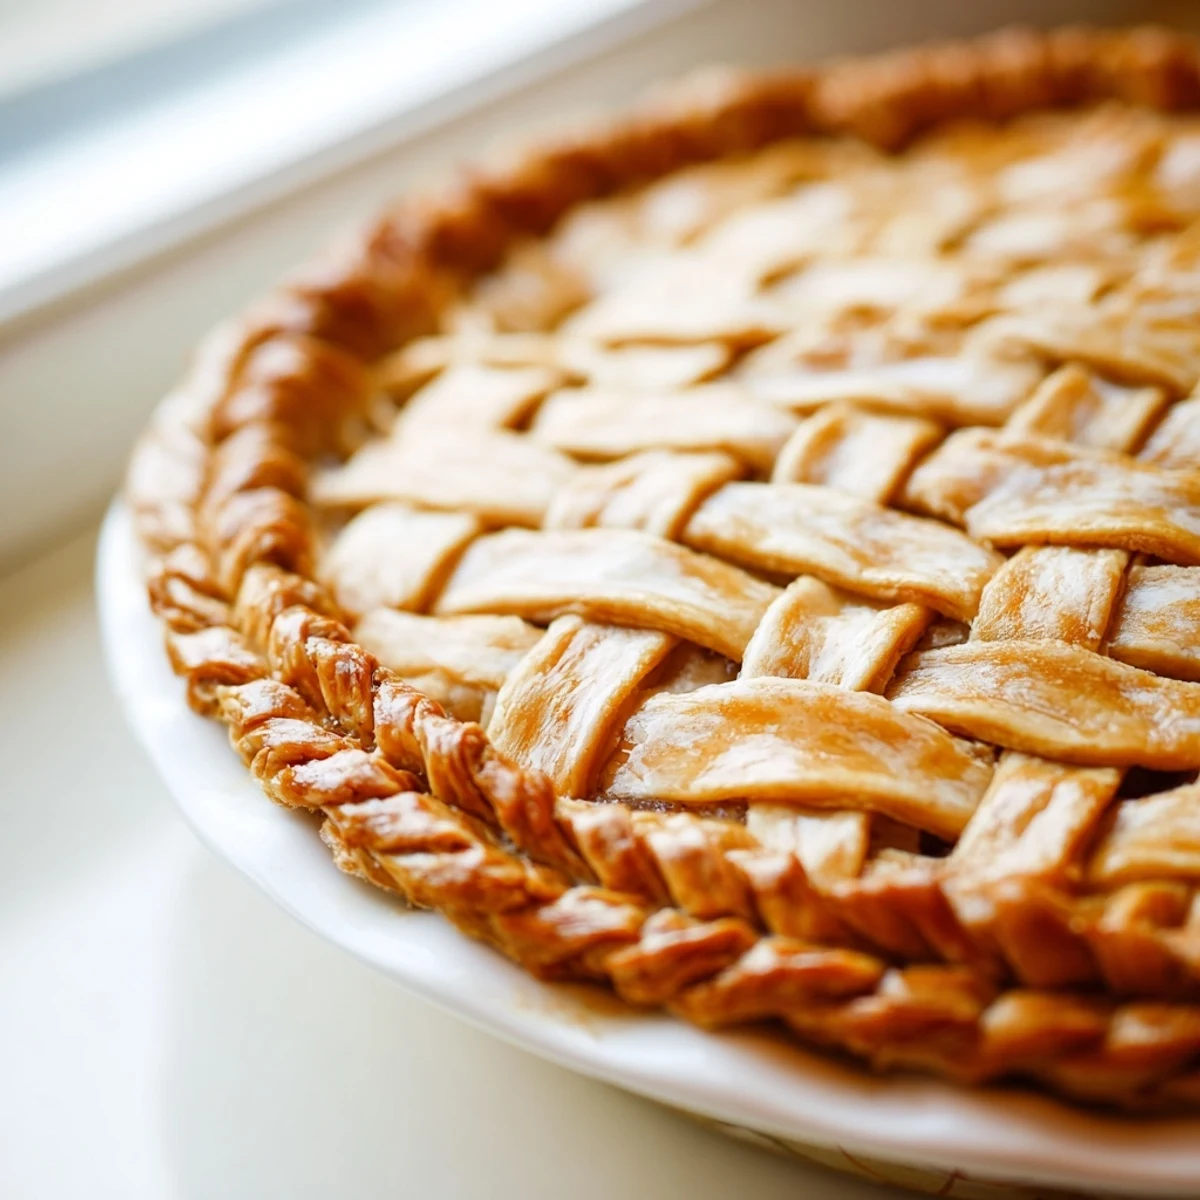
- Apply your braid to the pie:
- Trim excess dough from your filled pie, brush the rim lightly with water, then gently lift and shape your braid around the edge, pressing lightly to adhere before brushing with egg wash for that professional golden finish.
 Pin It
 My sister called me at 11 PM one night, completely panicked because she'd volunteered to bring dessert to her office holiday party the next morning and had zero baking experience. I talked her through this braided crust technique over the phone while she stood in her kitchen in pajamas, and she sent me a photo the next day of her pie looking absolutely gorgeous on the breakroom table. She texted that her coworkers kept asking which bakery she'd visited, and that moment of triumph—seeing someone discover they're capable of creating something beautiful—is exactly why I love sharing these details.
Working With Your Dough Temperature
Cold dough is your best friend here, and I mean literally cold to the touch. If your kitchen runs warm or you're working slowly, keep returning your dough to the refrigerator between steps. I've learned the hard way that warm, slack dough strips will stretch unevenly and lose that crisp definition that makes the braid so striking.
Getting Even Strips Every Time
The ruler might feel like overkill until you try cutting strips freehand and end up with a wonky braid that looks more like a drunk snake than decorative pastry. I now mark my dough with the back of a knife before cutting through, creating perfect guides that make all the difference in the final appearance.
Making The Braid Stick Permanently
That light brushing of water on your pie rim isn't optional—it's what creates the permanent bond between your filled pie and that beautiful braided edge. I learned this after watching a gorgeous braid slide off an apple pie during baking, landing sadly on the oven floor while I watched helplessly through the glass door.
- Press the braid gently but firmly onto the waterbrushed rim, focusing on creating contact at multiple points
- If your braid feels too long, don't stretch it to fit—trim the end and press it closed for a neat finish
- The egg wash should be applied lightly so it doesn't drip underneath and create steam pockets that could loosen your work
 Pin It
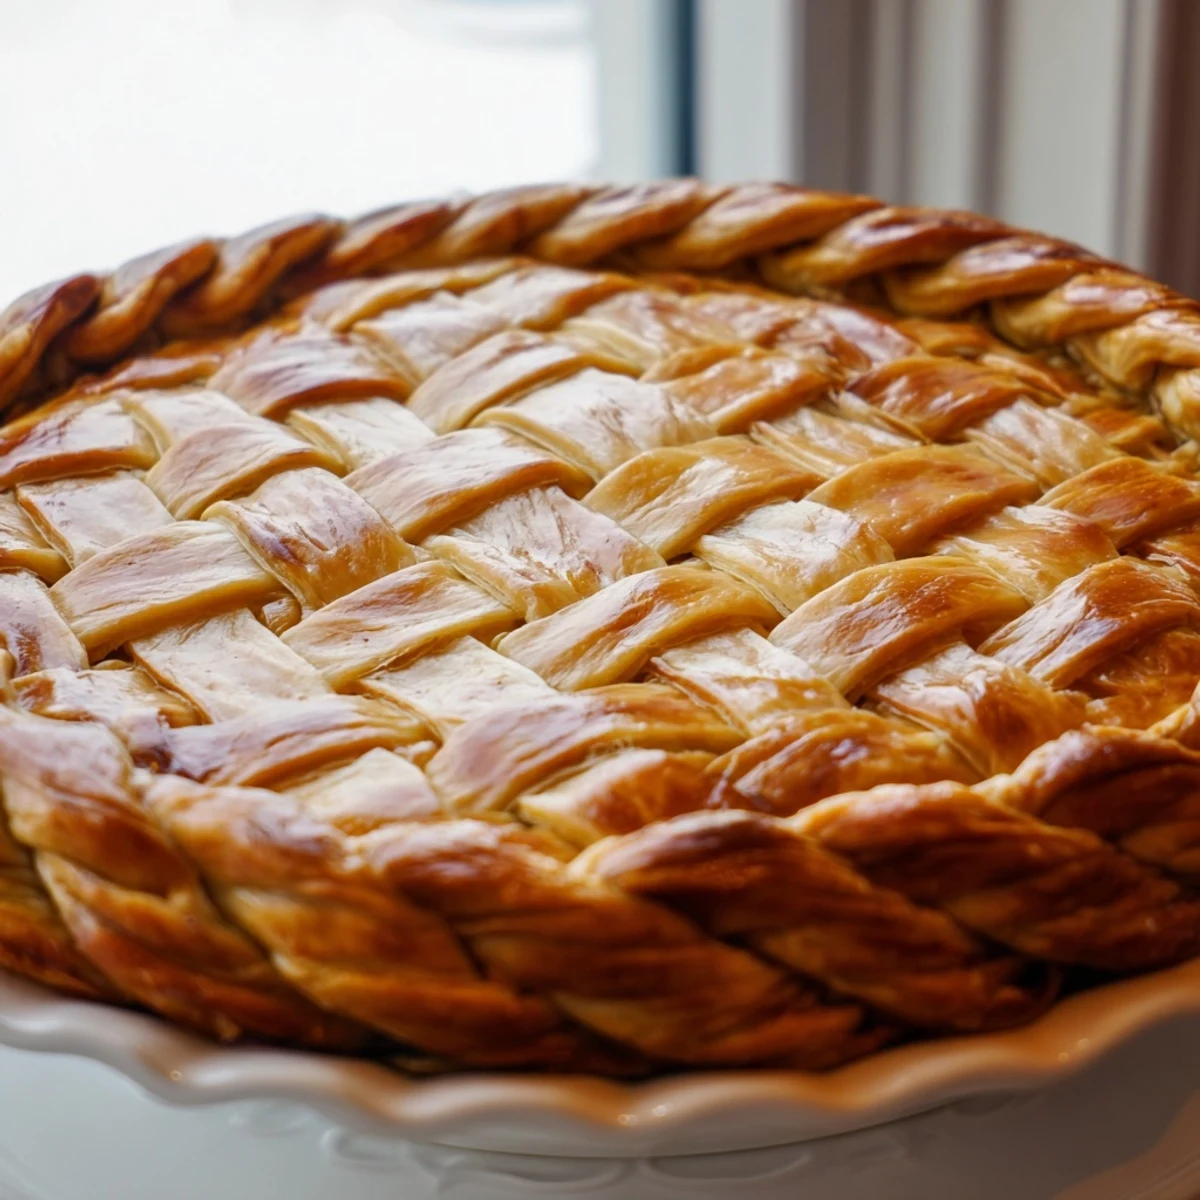
 Every pie deserves that moment when someone pauses before cutting into it, simply admiring what you've created. This braided crust is your way of adding love to every slice.
Recipe FAQs
- → What makes fishtail braiding different from regular braiding?
-
Fishtail braiding differs from regular braiding in that you only work with the outermost strands, crossing them over toward the center rather than weaving three strands continuously. This creates a flatter, more intricate woven appearance that resembles a fishtail pattern. The result is a delicate, sophisticated look that's perfect for decorative pastry edges.
- → How do I keep the dough strips from breaking while braiding?
-
Keep your dough thoroughly chilled throughout the process. Work quickly and avoid handling the strips too much with warm hands. If the dough becomes soft or sticky, place the strips in the refrigerator for 10-15 minutes before continuing. Using cold butter and ice water in the dough also helps create a more pliable, workable pastry that resists breaking.
- → Can I make the braided crust ahead of time?
-
Absolutely! You can prepare the braided crust up to 24 hours in advance. After creating the braid, carefully transfer it to a parchment-lined baking sheet and refrigerate, covered loosely with plastic wrap. When ready to use, simply brush the pie edge with water and gently position the chilled braid around the rim. This makes prep work much easier for entertaining.
- → What fillings work best with this decorative crust?
-
Fishtail braided crusts pair beautifully with both sweet and savory creations. Fruit pies like apple, cherry, or berry showcase the golden braid perfectly. For savory options, try quiches with spinach and cheese, chicken pot pie, or vegetable tarts. The braid adds elegance regardless of filling—just ensure the filling isn't overly liquid, which could make the bottom crust soggy during baking.
- → Do I need special tools to achieve this look?
-
No special equipment is required! Basic kitchen tools work perfectly: a rolling pin for flattening dough, a ruler or measuring tape for even strips, a knife or pizza cutter for cutting, and a pastry brush for applying egg wash. The technique relies more on patience and practice than fancy gadgets. Many home bakers successfully create stunning braided crusts with items they already own.
- → Can I use store-bought pie dough instead of homemade?
-
Yes, store-bought refrigerated pie dough works well for this technique. Look for all-butter varieties for the best flavor and texture. Thaw according to package directions, then proceed with rolling and cutting strips. Keep in mind that homemade dough typically offers more pliability and better flavor, but quality store-bought dough can still produce beautiful, impressive results with less prep time.
