 Pin It
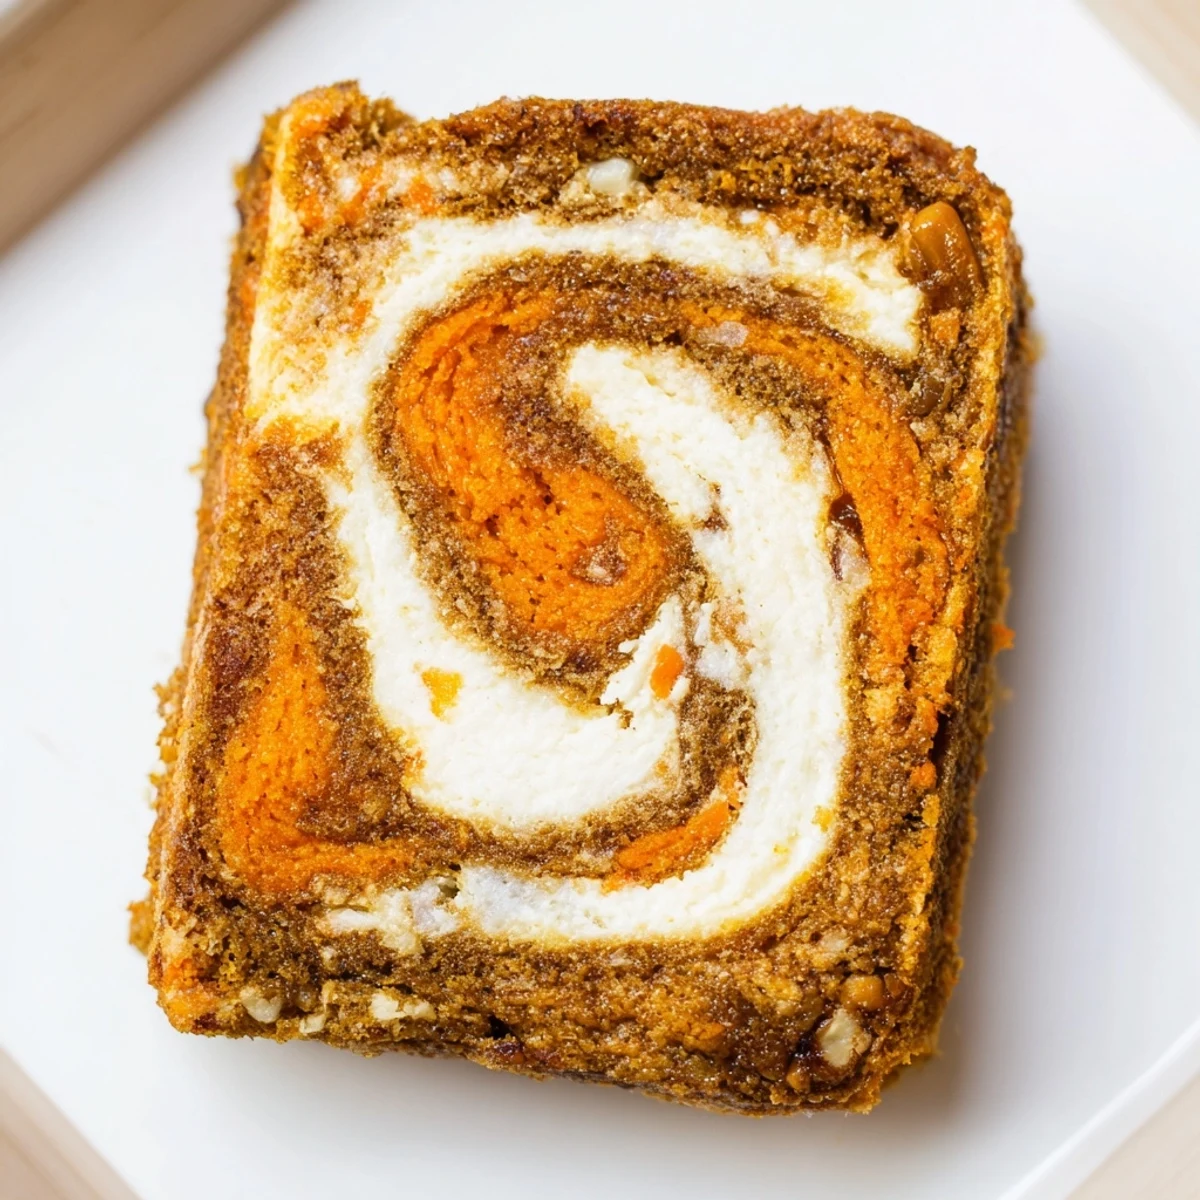
 These moist carrot cake cream cheese bars combine two beloved desserts into one irresistible treat. A spiced carrot cake batter, loaded with grated carrots, crushed pineapple, and optional nuts, gets swirled with a rich cream cheese layer.
The marbled pattern creates beautiful slices, while the combination of warm spices like cinnamon and nutmeg balances the tangy cheesecake filling. Perfect for spring gatherings, potlucks, or whenever you want a handheld version of the classic cake.
Baking takes about 40 minutes, and chilling for 2 hours before slicing ensures clean, neat bars that hold their shape. Store them in the refrigerator for up to 4 days, though they rarely last that long!
The smell of cinnamon and grated carrots filled my tiny apartment kitchen during my first attempt at these bars, and I honestly couldnt believe something this beautiful came out of my oven. My roommate wandered in, drawn by the aroma, and we both ended up eating them warm straight from the pan with forks because waiting for them to cool seemed impossible.
I made these for my mothers birthday one year when she mentioned craving carrot cake but wanted something easier to serve than a layered cake. Seeing her face light up when she cut into that swirled pattern made me realize the best desserts are the ones that feel special without requiring fancy techniques.
Ingredients
- All-purpose flour (130 g): The structure builder that keeps these bars tender but sturdy enough to hold that gorgeous cream cheese swirl
- Baking powder and baking soda: These work together to give the carrot cake layer just the right amount of lift without making it too cakey
- Salt (1/4 tsp): Dont skip this tiny amount it makes all the warm spices sing and balances the sweetness
- Ground cinnamon (1 tsp): The backbone spice that makes these taste like classic carrot cake, warm and comforting
- Ground nutmeg (1/4 tsp): Adds that subtle background warmth that people notice but cant quite put their finger on
- Light brown sugar (100 g): Packed with molasses flavor for moisture and that beautiful golden color in the baked bars
- Granulated sugar (75 g total): Split between both layers for consistent sweetness and crisp edges
- Large eggs (3 total): Room temperature eggs blend better and help create that smooth marble effect between layers
- Vegetable oil (120 ml): I learned oil keeps these bars moist longer than butter, which is crucial for make ahead desserts
- Vanilla extract (1 1/2 tsp total): Real vanilla extract makes both layers taste bakery quality
- Freshly grated carrots (150 g): Use the fine side of your box grater for the best texture and even distribution throughout the batter
- Crushed pineapple (60 g): The secret ingredient my grandmother swore by for extra moisture, but drain it really well first
- Chopped walnuts or pecans (35 g): Toast them lightly beforehand if you want to amplify their nutty flavor
- Cream cheese (225 g): Full fat and completely softened prevents lumps and gives that silky smooth cheesecake layer
Instructions
- Get your oven ready:
- Preheat to 350°F (175°C) and line an 8x8-inch pan with parchment paper, letting the ends hang over like handles for easy removal later.
- Whisk the dry ingredients:
- In a medium bowl, combine flour, baking powder, baking soda, salt, cinnamon, and nutmeg until everything is evenly distributed.
- Mix the wet carrot cake base:
- Whisk both sugars, eggs, oil, and vanilla in a large bowl until smooth and slightly thickened.
- Add the good stuff:
- Fold in grated carrots, drained pineapple, and nuts until just combined.
- Combine the layers:
- Add dry ingredients to the wet mixture and stir gently until no flour streaks remain.
- Make the creamy layer:
- Beat softened cream cheese until smooth, then blend in sugar, egg, and vanilla until completely lump free.
- Layer it up:
- Spread about two thirds of the carrot batter in the pan, pour all the cream cheese mixture over it, and drop spoonfuls of the remaining carrot batter on top.
- Create the swirl:
- Run a knife through the batters in a figure eight pattern just once or twice for that marble effect without overmixing the layers.
- Bake until set:
- Bake for 38 to 42 minutes until the center barely jiggles and a toothpick comes out with just a few moist crumbs.
- The hardest part:
- Cool completely in the pan, then refrigerate for at least 2 hours before slicing into clean squares.
 Pin It
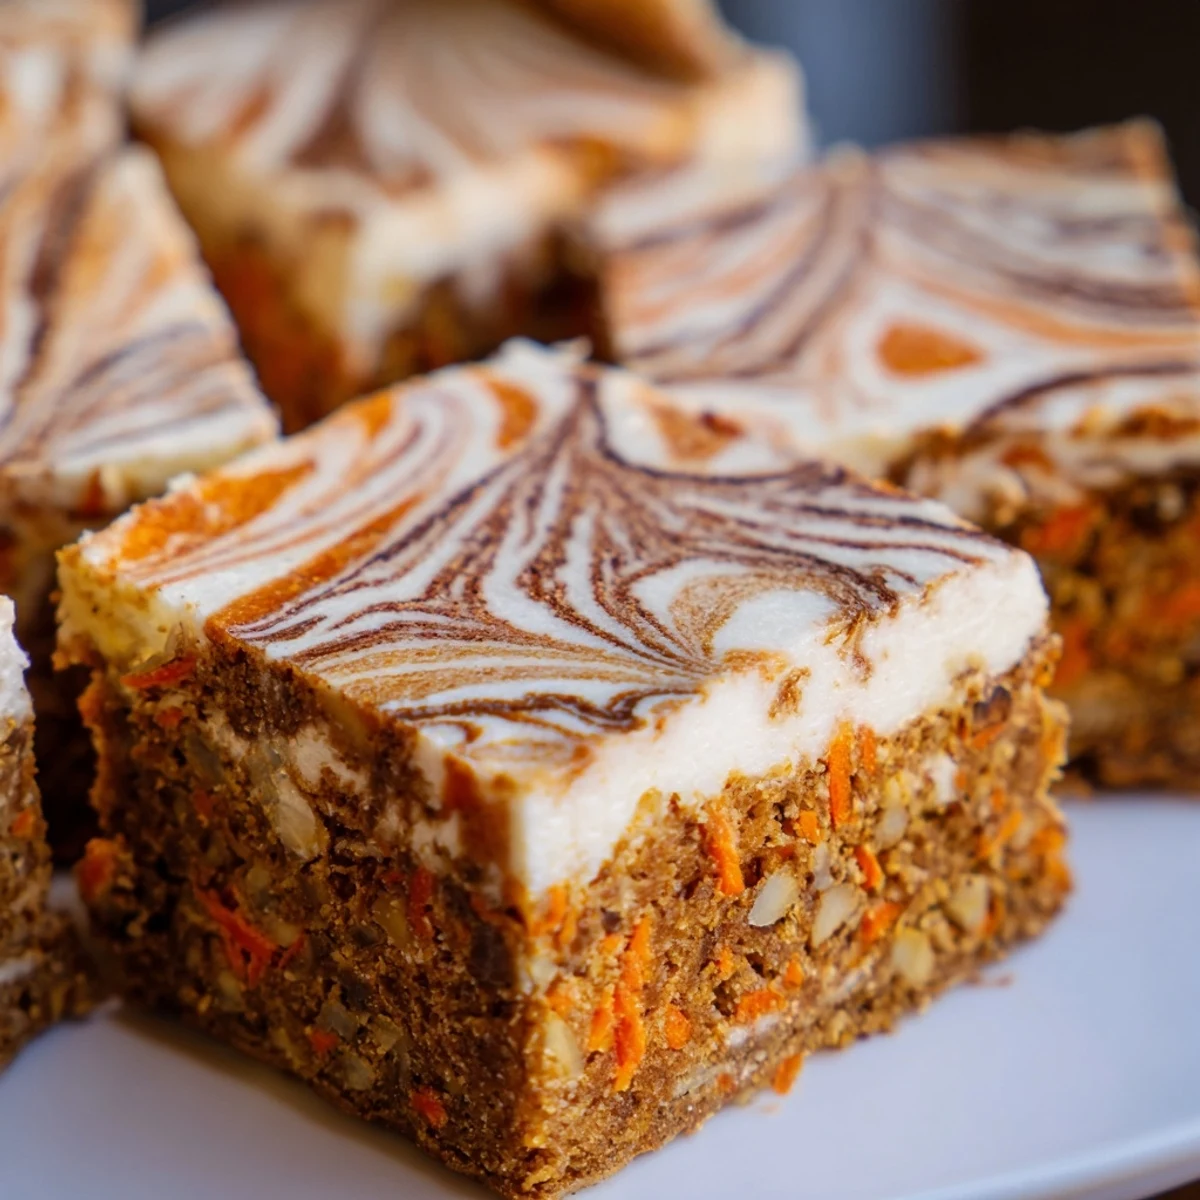
 These bars have become my go to contribution for every spring potluck and baby shower, mostly because they travel so well and always disappear within minutes. My friend Sarah actually requested them instead of a birthday cake last year, saying the combination of textures and flavors was exactly what she wanted.
Making Ahead
Ive learned these bars actually taste better on day two, once the flavors have had time to meld and the cream cheese layer sets completely. The bars keep perfectly in the refrigerator for up to four days, though they rarely last that long in my house.
Serving Suggestions
Sometimes I dust them with powdered sugar right before serving for that bakery look, but a dollop of whipped cream on the side feels extra special. They pair beautifully with afternoon coffee or as a slightly indulgent dessert after a lighter dinner like grilled fish and salad.
Storage and Freezing
Freeze individual portions wrapped tightly in plastic and then foil for up to three months. Thaw overnight in the refrigerator for the best texture.
- Place a piece of parchment between layers if stacking them for storage
- Bring to room temperature for about 20 minutes before serving for the creamiest texture
- The bars can be frozen unbaked and baked straight from the freezer, adding about 5 minutes to the baking time
 Pin It
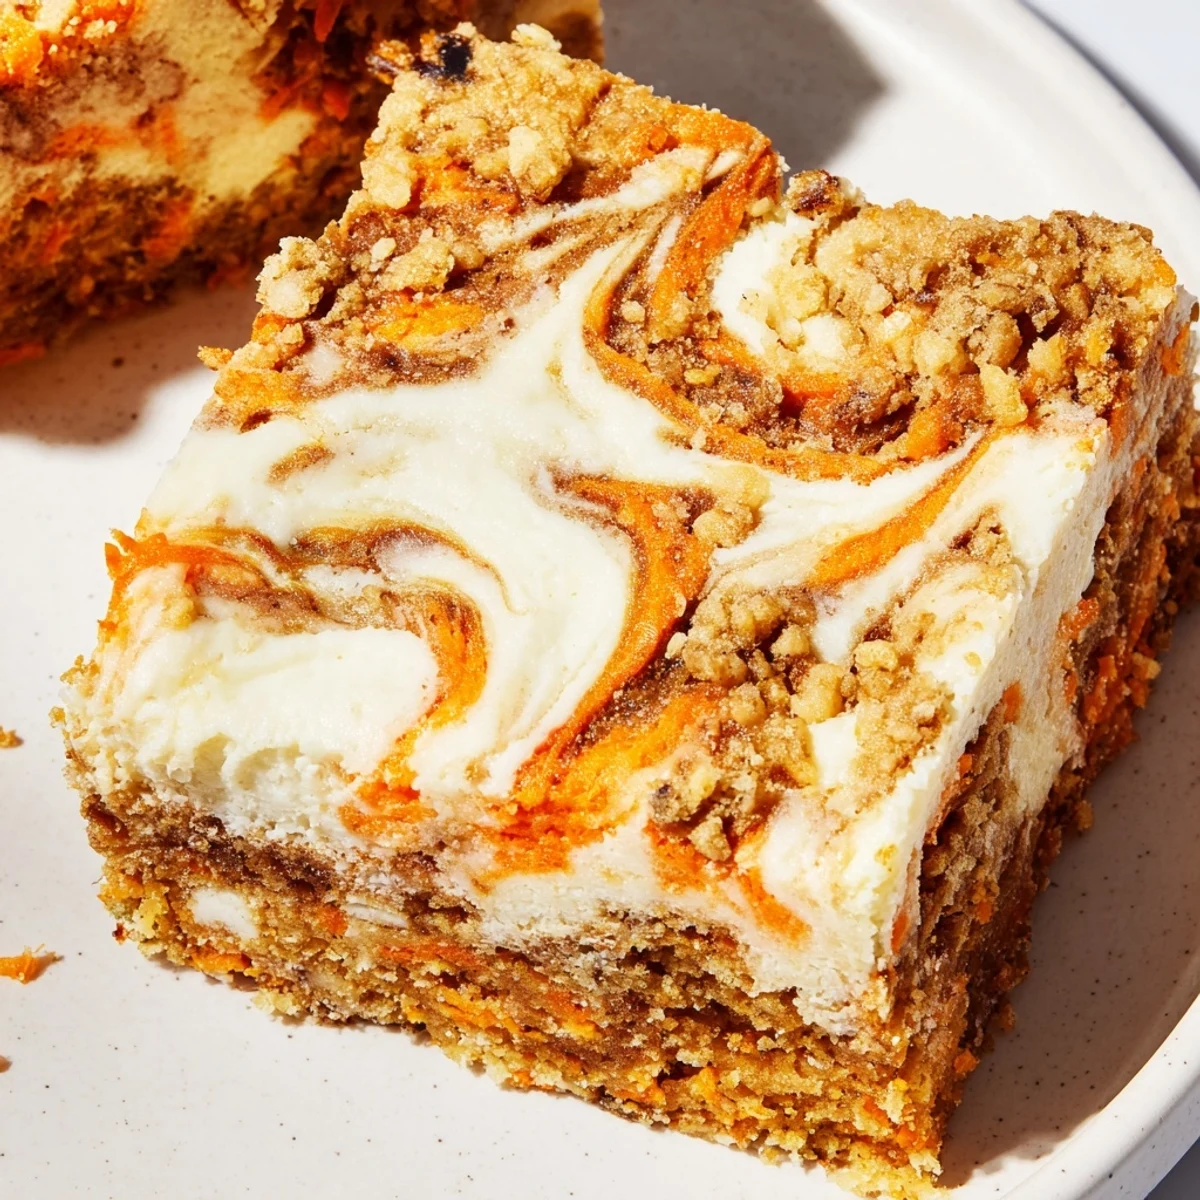
 Theres something so satisfying about cutting into these bars and seeing that perfect swirl, like you created edible art without any stress or fancy techniques.
Recipe FAQs
- → Can I make these bars ahead of time?
-
Yes, these bars actually taste better after chilling overnight. You can make them up to 2 days before serving. Store them covered in the refrigerator and bring to room temperature 30 minutes before serving for the best texture and flavor.
- → Do I need the pineapple in the carrot cake layer?
-
The pineapple is optional but recommended. It adds natural sweetness and moisture to the carrot cake layer, keeping the bars tender. If you prefer, you can substitute with unsweetened applesauce or simply omit it entirely.
- → How do I know when the bars are done baking?
-
Insert a toothpick into the center of the pan — it should come out mostly clean with just a few moist crumbs. The cream cheese layer will still look slightly jiggly, which is normal. The bars will set completely as they cool.
- → Can I freeze carrot cake cream cheese bars?
-
Yes, these freeze beautifully. Wrap individual bars tightly in plastic wrap, then place in a freezer-safe container for up to 3 months. Thaw overnight in the refrigerator before serving. The texture remains excellent after freezing.
- → What's the best way to achieve the marbled swirl effect?
-
Drop spoonfuls of the remaining carrot cake batter over the cream cheese layer rather than spreading it. Use a knife or skewer to gently drag through both layers in a figure-eight or circular motion. Don't over-swirl or you'll lose the distinct marbled pattern.
- → Can I use a different size pan?
-
An 8x8-inch pan creates thick, rich bars. A 9x13-inch pan will work but produce thinner bars and reduce baking time to about 30-35 minutes. Watch closely to avoid overbaking.
