 Pin It
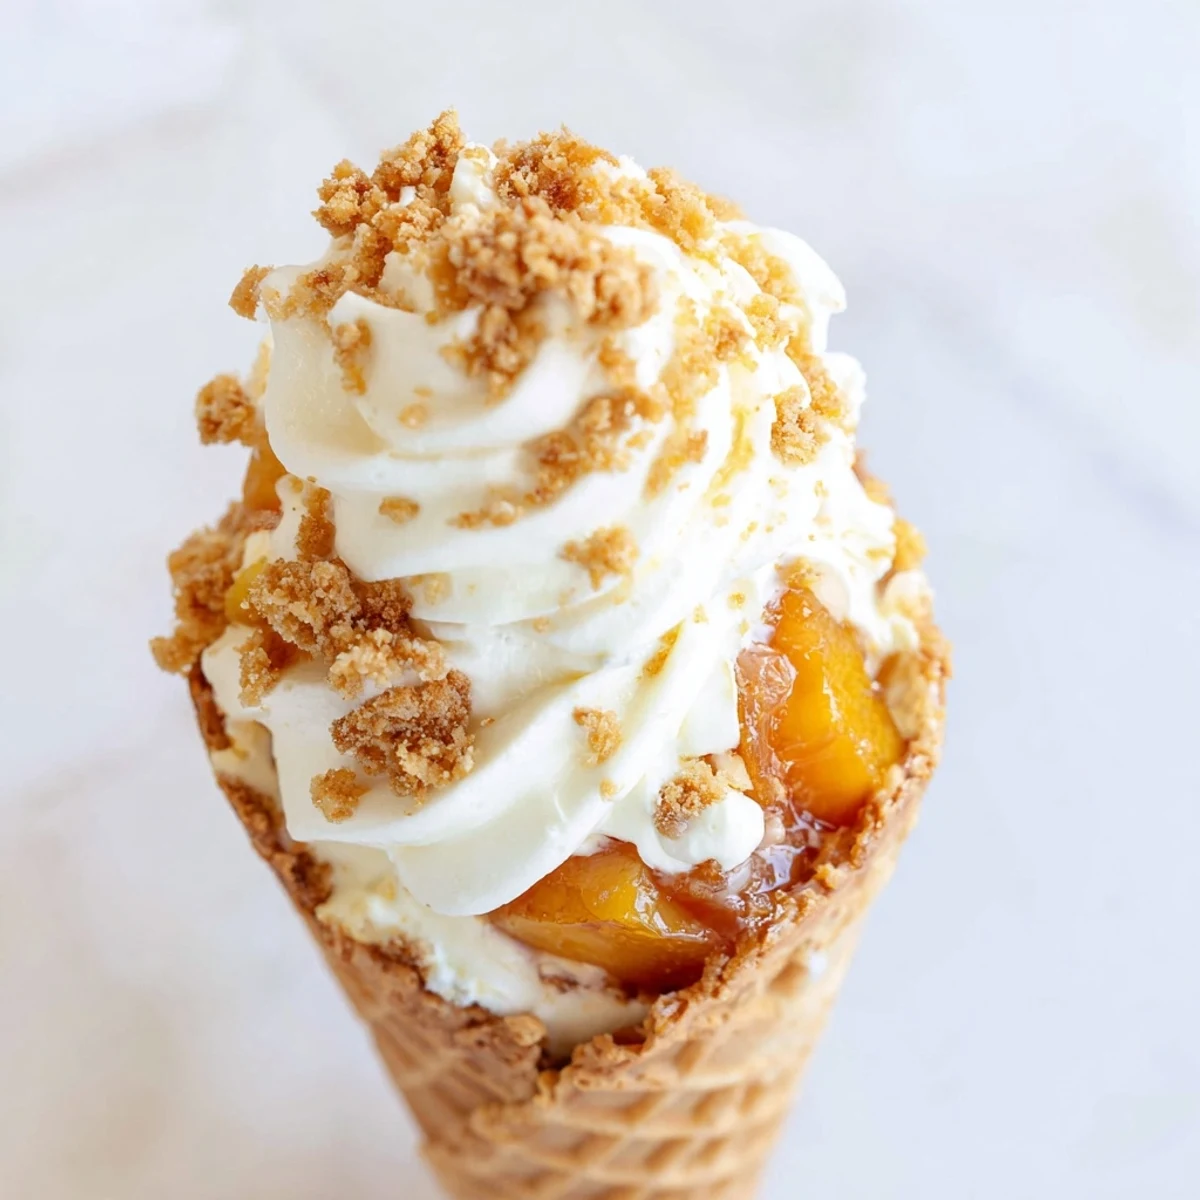
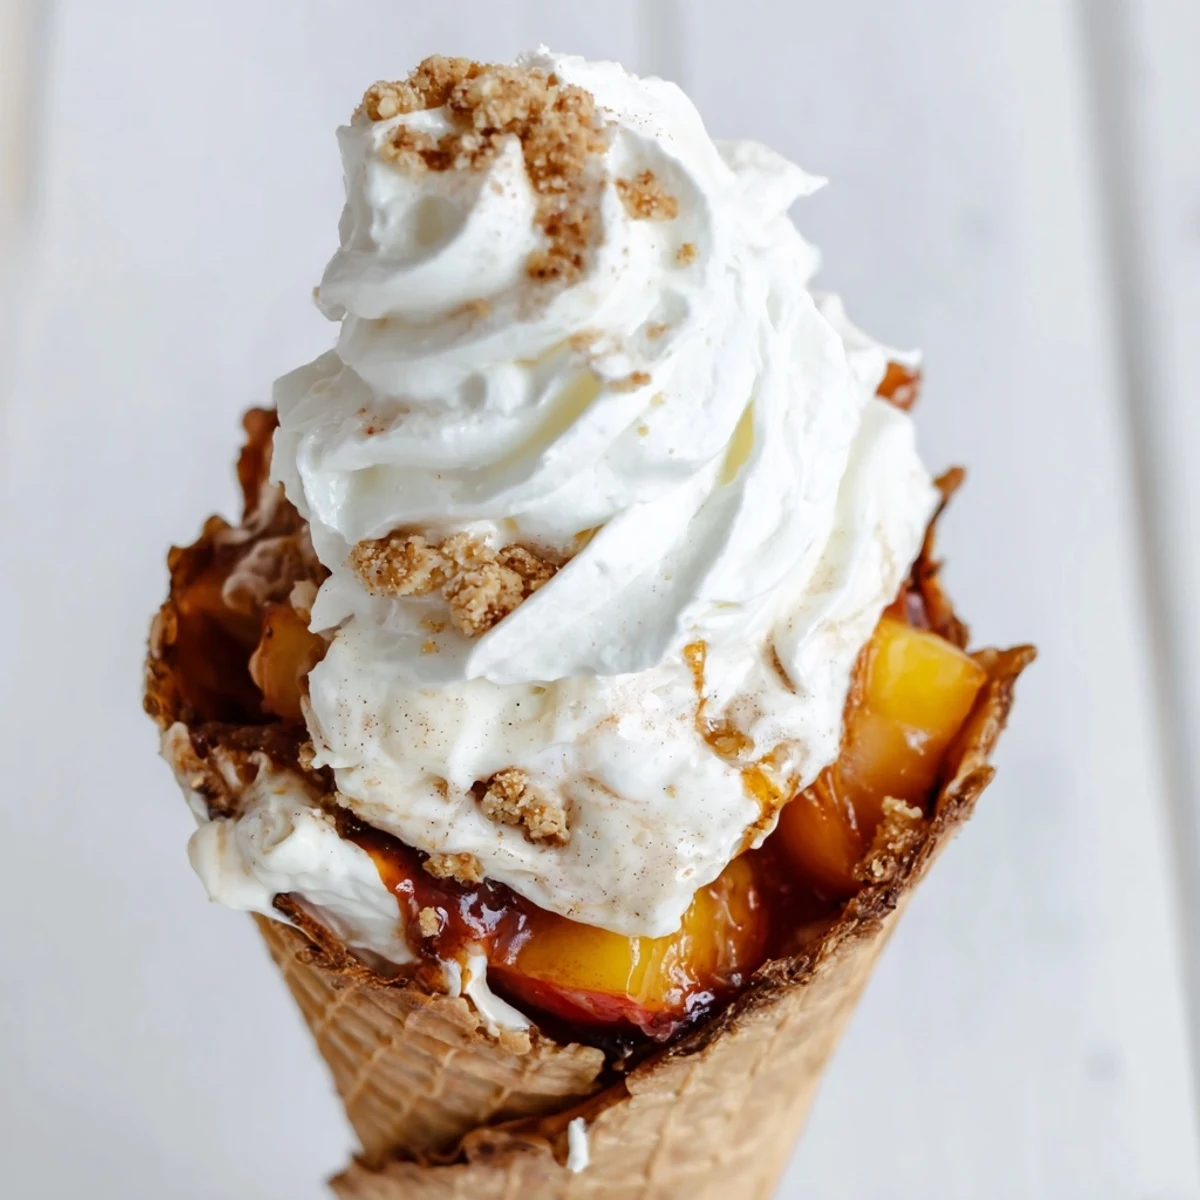
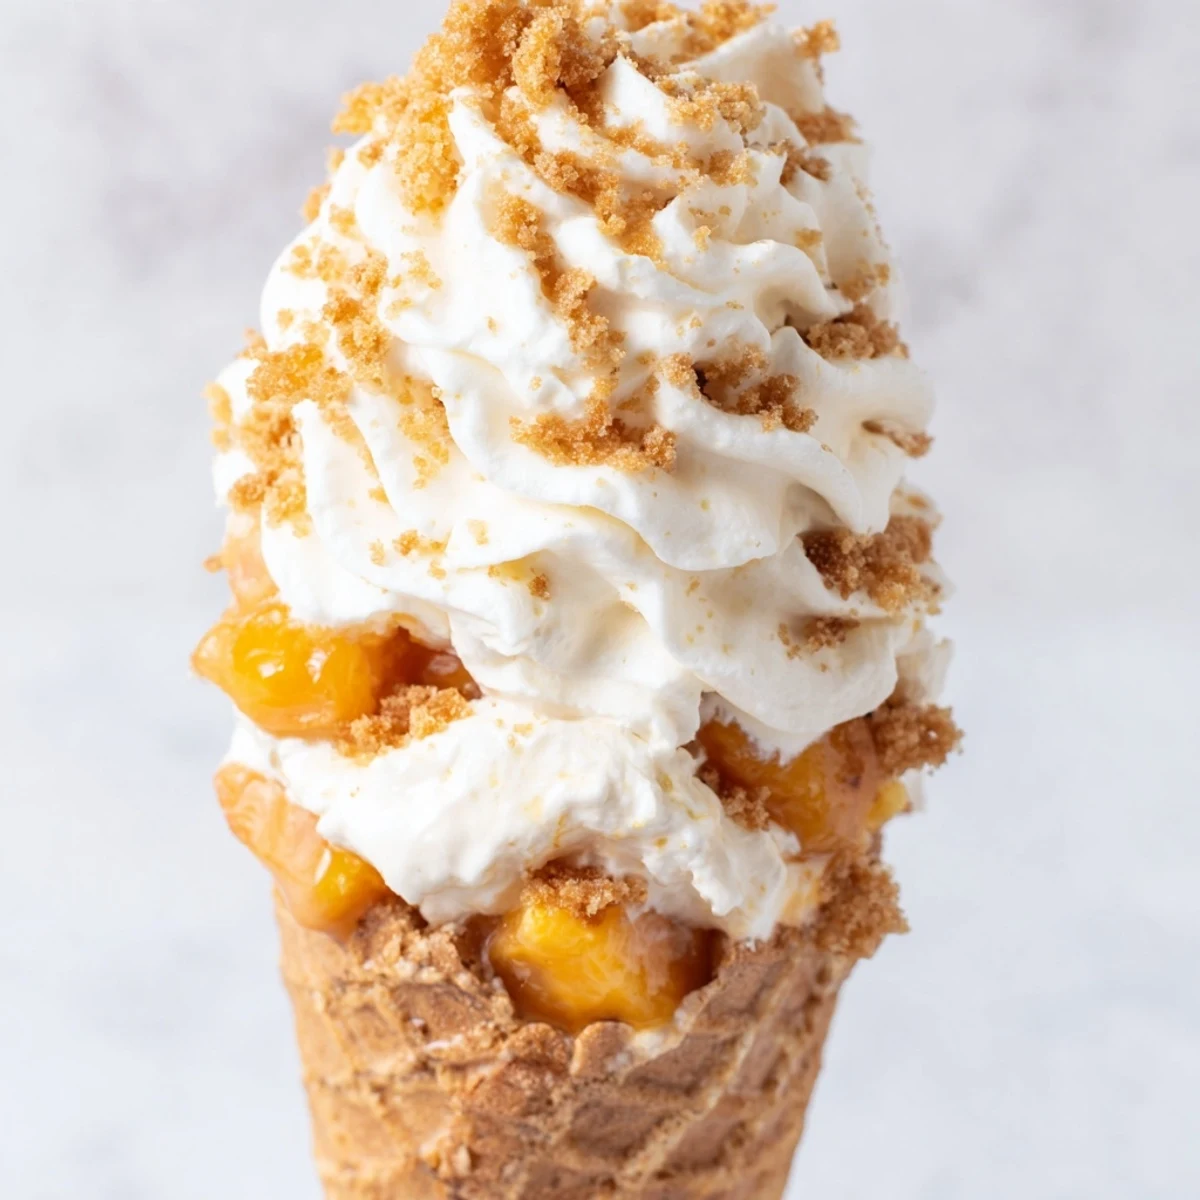
 These handheld treats combine the best of two beloved desserts - creamy cheesecake and classic peach cobbler - all served in crispy waffle cones. The fresh peaches are cooked with cinnamon and sugar until thickened, then layered with a lightened cheesecake mousse made from whipped cream and cream cheese. Each cone delivers satisfying crunch followed by smooth, fruity sweetness.
Assembly takes just minutes after the components are prepped, making these ideal for summer parties, barbecues, or backyard gatherings. The portable format means guests can easily mingle while enjoying their dessert. For best results, assemble close to serving time to maintain the cones' signature crunch.
The first time I made these, I was trying to use up an abundance of peaches from my farmers market run and happened to have leftover cheesecake filling from another dessert. My kitchen smelled incredible as the peaches simmered with cinnamon and I remember thinking how perfectly portable this combination would be. When I took that first bite, the crunch of the cone against the creamy cheesecake and warm spiced peaches felt like discovering a new way to experience summer.
I brought a batch to my sisters July barbecue last summer and her kids went absolutely wild for them. The little ones were so excited about eating dessert out of ice cream cones that they didnt even notice I was sneaking fruit into their treat. My sister asked me to teach her how to make them and now theyve become our go to contribution to every potluck.
Ingredients
- Ripe peaches: Fresh peaches that give slightly when pressed are perfect here, they break down beautifully as they simmer
- Granulated sugar: This draws out the natural juices from the peaches and creates that lovely syrupy consistency
- Lemon juice: A splash of bright acidity balances the sweetness and enhances the peach flavor
- Ground cinnamon: This classic pairing with peaches instantly evokes cobbler vibes
- Cornstarch: Essential for thickening those peach juices into a proper filling consistency
- Cream cheese: Make sure its truly softened to avoid any lumps in your cheesecake filling
- Powdered sugar: Dissolves more smoothly than granulated sugar into the cream cheese mixture
- Vanilla extract: Pure vanilla extract makes a noticeable difference in the filling
- Heavy whipping cream: Cold cream whips up faster and holds its shape better in the final filling
- Waffle cones: Look for the larger sugar cone style rather than the smaller cake cones
- Graham cracker crumbs: These mimic the traditional cobbler topping and add essential texture
- Melted butter: Helps the graham cracker crumbs adhere to the creamy filling
- Whipped cream: The finishing touch that makes these feel extra indulgent
Instructions
- Simmer the peach filling:
- Combine your diced peaches, sugar, lemon juice, and cinnamon in a saucepan over medium heat, stirring gently as the peaches soften and release their juices. The mixture will start to smell absolutely wonderful as it bubbles away.
- Thicken the peaches:
- Whisk your cornstarch and water together until completely smooth, then stir this slurry into the bubbling peaches. Continue cooking for another minute or two until you see the filling transform into a glossy, spoonable consistency, then remove from heat.
- Prepare the cheesecake base:
- Beat your softened cream cheese, powdered sugar, and vanilla until you have a completely smooth mixture with no lumps remaining. Take your time here to ensure the final filling will be perfectly creamy.
- Whip the cream:
- In a separate bowl, whip your cold heavy cream until you reach stiff peaks that hold their shape when you lift the beaters. This step is crucial for the light, mousse like texture of the finished filling.
- Combine the filling:
- Gently fold about one third of the whipped cream into the cream cheese mixture to lighten it, then carefully fold in the remaining cream until no white streaks remain. The result should be fluffy and airy.
- Prepare the crumble topping:
- Mix your graham cracker crumbs with melted butter until they resemble wet sand. This optional step adds that signature cobbler topping crunch to every bite.
- Assemble the cones:
- Spoon or pipe a layer of cheesecake filling into the bottom of each cone, followed by a generous spoonful of the cooled peach filling. Repeat the layers if your cones have room, then crown with the graham cracker crumble and a dollop of whipped cream.
 Pin It
 These have become such a requested dessert at our family gatherings that my niece now specifically asks for the ice cream cones instead of birthday cake. Theres something so joyful about handheld dessert, the way everyone can just grab one and keep mingling while they eat. The combination of warm spiced peaches, cool creamy cheesecake, and the crunch of the cone never fails to make people smile.
Peach Perfection Secrets
Peeling peaches can be tedious, but I learned a trick that changed everything. Score the bottom of each peach with an X, then drop them in boiling water for 30 seconds before immediately transferring to an ice bath. The skins slip right off, and you end up with perfectly peeled fruit ready for your filling.
Make Ahead Magic
The beauty of this recipe is how much you can prepare in advance. The peach filling keeps beautifully in the refrigerator for up to three days, and the cheesecake filling stays fresh for two days. When party time arrives, you just need to assemble and serve, which means less stress and more time with your guests.
Serving Success
Ive found that setting up a little assembly station works wonderfully for parties. Put the components in separate bowls and let guests build their own cones to their preferred ratios. This interactive element always gets people talking and laughing in the kitchen.
- Small spoons or miniature ice cream scoops make filling the cones so much easier
- Piping bags with large tips create beautiful, tidy layers if you want an extra polished look
- Have extra napkins ready, because the combination of creamy and crunchy can get delightfully messy
 Pin It
 These peach cobbler cheesecake cones capture everything wonderful about summer in one delightful, crunchy bite.
Recipe FAQs
- → Can I make these peach cones ahead of time?
-
For optimal texture, assemble the cones within 1 hour of serving. The peach filling and cheesecake mousse can both be prepared a day in advance and stored separately in the refrigerator. Keep components chilled until ready to fill the cones.
- → What if fresh peaches aren't in season?
-
Frozen or canned peaches work wonderfully in this dessert. Thaw frozen peaches completely before cooking and drain excess liquid. For canned peaches, skip the initial cooking step and simply mix with cinnamon and cornstarch, then heat briefly to thicken.
- → How do I prevent the cones from getting soggy?
-
The key is timing - fill cones just before serving and avoid adding warm peach filling to cold cheesecake. You can also brush the inside of cones with melted chocolate or add a small layer of graham cracker crumble at the bottom as a protective barrier between filling and cone.
- → Can I use a different type of cone?
-
Sugar cones or even homemade waffle bowls work beautifully. Keep in mind that larger cones require more filling to achieve the desired layered effect. For a gluten-free option, use certified GF cones or serve the filling in small mason jars topped with crushed gluten-free cookies.
- → What other fruit fillings could I use?
-
This versatile format works with almost any fruit filling. Try mixed berries, cherry pie filling, spiced apples, or even blueberry compote. Adjust cooking time based on the fruit's water content - berries need less thickening time than stone fruits.
- → How should I store leftover assembled cones?
-
Unfortunately, assembled cones don't store well due to texture changes. Store unfilled cones in an airtight container at room temperature. Keep leftover cheesecake mousse and peach filling separately in the refrigerator for 2-3 days and assemble fresh portions as needed.
